
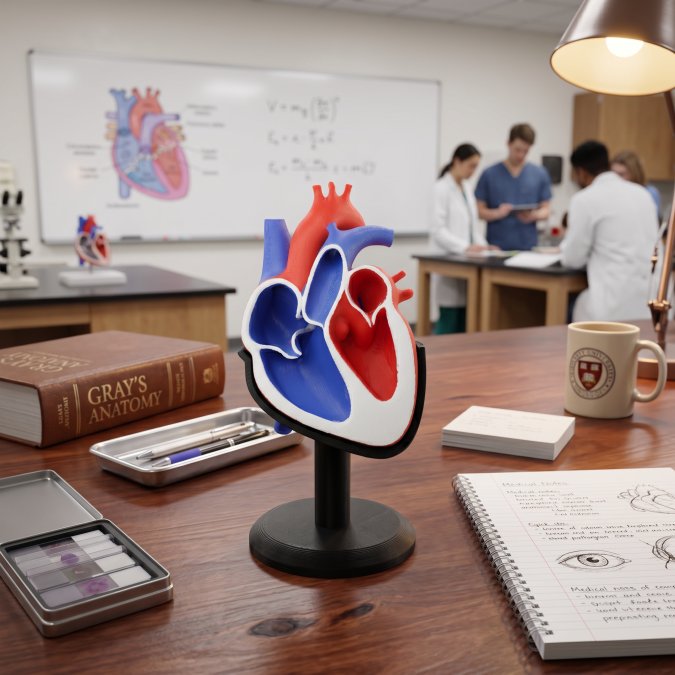

Last Updated: October 31, 2026
Quick Summary
Inclusive teaching in anatomy education means designing curriculum, language, materials, and assessment so every learner can engage with the same core content. Build accessibility in from the start through multiple formats, clear objectives, and more than one route to demonstrate competency.
- Provide the same content in more than one format, such as a labeled diagram, a physical model, and a written description.
- Replace at least one passive review session per unit with an active learning session.
- Match structural fidelity to the assessment, tactile fidelity to the skill, and contextual fidelity to the learner’s level.
- Use station rotations so no single format decides a student’s grade.
- Measure outcomes at four levels: reaction, learning, behavior, and results.
Table of Contents
- Why Inclusive Teaching Strategies Matter in Anatomy Education
- Building Accessible Anatomy Education for Every Learner
- How Active Learning in Anatomy Improves Retention
- Using 3D Anatomy Models for Teaching Diverse Classrooms
- Inclusive Anatomy Lesson Activities That Work
- A Selection Framework by Learner Level and Learning Objective
- Evidence of Training Effectiveness and Assessment
- Cleaning, Durability, and Accessibility of Teaching Tools
- Bringing Inclusive Anatomy Tools Into Your Classroom
- Frequently Asked Questions
Why Inclusive Teaching Strategies Matter in Anatomy Education
Inclusive teaching strategies for anatomy education are the deliberate choices instructors make about curriculum design, language, materials, and assessment so that every learner can engage with the same core content. At LumaLayer Creations, we build tangible anatomical models for classrooms, and inclusive design is a theme we care about in how tools are made for learners.
That shift is not cosmetic. A 2024 study in Anatomical Sciences Education on students’ perspectives of inclusive practices describes a drive to adapt curricula and adopt inclusive language and resources, while noting that the field is still working out how to implement those changes consistently.
Here is the tension most guides skip: anatomy is a content-heavy discipline with high-stakes assessment, and inclusive practice can feel like an add-on to an already full syllabus. It is not. For a wider catalogue of tools that support this work, see our anatomy teaching tools for educators.
Building Accessible Anatomy Education for Every Learner
Accessible anatomy education starts with the assumption that learners arrive with different prior knowledge, different sensory access needs, and different levels of comfort with lab environments. Design for that spread up front and you spend less time retrofitting accommodations later.
The practical moves are unglamorous but effective:
- Provide the same content in more than one format, such as a labeled diagram, a physical model, and a short written description.
- Publish learning objectives before each session so students know what they are expected to do, not just what they will see.
- Offer low-stakes ways to check understanding before graded assessments.
- State terminology clearly and consistently, and flag synonyms early.
What most guides miss is that accessibility in anatomy is often a sequencing problem. A student who cannot see a structure at a distance can still learn it from a model passed hand to hand. A student who processes text slowly can still demonstrate competency in a practical assessment. The content stays the same; the routes to it multiply.
Universal Design for Learning in Practice
Universal Design for Learning, or UDL, is a framework for planning courses with learner variability built in from the start rather than added afterward. A scoping review indexed in Anatomical Sciences Education on UDL in healthcare education examined whether UDL had been used in third-level healthcare education and whether it had been used to enhance learning, which tells you the framework is being taken seriously even where the evidence base is still forming.
In practice, UDL in an anatomy course looks like three parallel channels. Representation: the same structure shown as a physical model, a digital render, and a labeled schematic. Action and expression: students demonstrate knowledge through a practical identification, a written explanation, or a short presentation. Engagement: choice in how students practice, with clear expectations for all routes.
None of that requires new technology. It requires deciding, before the term starts, that one route is not enough.
Language, Representation, and Respectful Content
Language carries assumptions, and anatomy teaching has a long history of carrying them. The University of Plymouth’s framing points toward curriculum design that normalizes variation, and that starts with the words on your slides and handouts.
Three habits help. First, describe structures by their anatomical names and avoid casual shorthand that implies a “standard” body. Second, when you discuss clinical examples, vary the populations and contexts so students do not absorb a single default patient. Third, audit your images and models for representation, including skin tone in surface anatomy materials and variation in body size and shape.
Respectful content is not a separate module. It is the default setting of every lecture, lab, and assessment.
How Active Learning in Anatomy Improves Retention
Active learning in anatomy improves retention because it forces retrieval and application instead of passive review. Students who explain a structure to a peer, or use a model to trace a pathway, practice the same cognitive moves an exam will require. That is the core argument, and it is why we push instructors to replace at least one passive review session per unit with an active one.
The design matters more than the label. A group activity with no individual accountability can let strong students carry the work. A well-built active session gives every learner a turn at retrieval.
Low-Stakes Retrieval and Peer Instruction
Low-stakes retrieval is the highest-return change most instructors can make. Short, frequent, ungraded or lightly graded quizzes on structures and terminology build durable memory far better than rereading notes.
Peer instruction pairs well with it. Pose a question, let students answer individually, then have them discuss in pairs before answering again. The discussion step surfaces misconceptions in real time, and you hear which structures are tripping up the room.
A simple weekly rhythm works:
- Five-question retrieval warm-up at the start of lab.
- Pair discussion on the two most-missed items.
- One applied question using a physical or digital model.
- A two-minute summary written by each student.
Keep the stakes low and the frequency high. The goal is practice, not punishment.
Using 3D Anatomy Models for Teaching Diverse Classrooms
3D anatomy models for teaching give every student in the room a shared, inspectable object, which is exactly what a diverse classroom needs. A physical model can be passed, rotated, and examined up close; a digital model can be zoomed and labeled; a hybrid setup combines both. But the format decision is not a brand preference, it is a fidelity decision, and most guides skip that part.
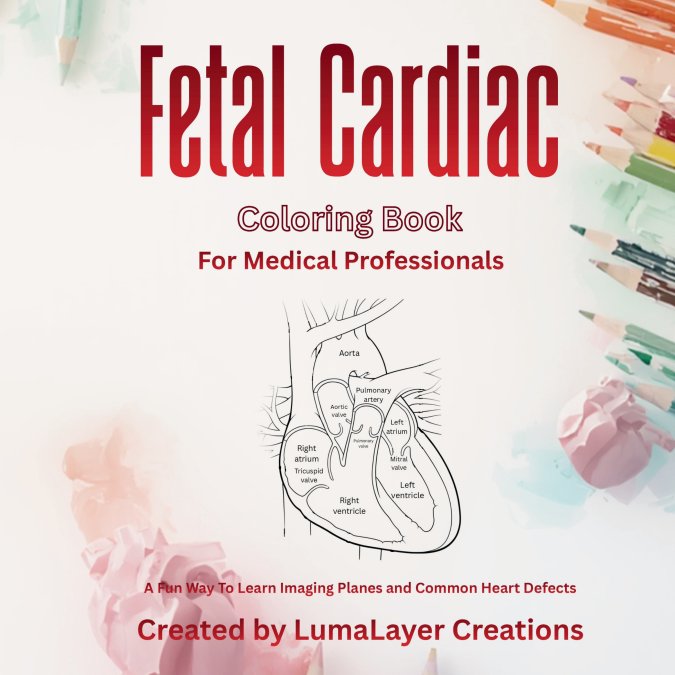
Cover of cardiac coloring book
Before you choose a format, it helps to see how models fit into a full teaching plan. Our guide on how to teach anatomy with models walks through the practical decisions.
Physical, Virtual, and Hybrid Model Options
Each format has a distinct job, and the mistake is treating them as competitors rather than a set. The table below adds the column most buying guides leave out: what the format can and cannot teach.
|
Format |
Best For |
Main Limitation |
What It Teaches Well |
What It Cannot Teach |
|---|---|---|---|---|
|
Physical 3D-printed model |
Hands-on identification, tactile learners, lab stations |
Fixed scale; storage and handling wear |
Spatial relationships, palpation-like handling, surface landmarks |
Internal structures on a single-piece print; dynamic motion |
|
Virtual/digital model |
Zoom, labels, layered systems, remote access |
Requires devices and reliable connectivity |
Layered dissection, cross-sections, recall quizzing, remote review |
Tactile discrimination; real-world scale and weight |
|
Hybrid setup |
Pairing tactile and digital, stations, revision |
Needs coordination and setup time |
Transfer between 2D, 3D, and physical representations |
Anything requiring fresh tissue or live physiology |
|
Standardized patient or peer model |
Communication, surface anatomy, clinical reasoning |
Scheduling, training, variability between sessions |
Applied anatomy in context, professional behaviors |
Deep internal structure identification |
A common mistake is buying a single large model and expecting it to serve every learning objective. A heart model that shows external vessels well may be useless for internal chamber relationships. Match the model to the objective, not the other way around.
Matching Fidelity to the Learning Objective
Fidelity is not a single dial. A model can be high-fidelity in shape and low-fidelity in texture, or high-fidelity in color and low-fidelity in scale. Instructors who get the most out of a budget treat fidelity as three separate questions:
- Structural fidelity, does the model show the relationships the objective names? A cast of the ventricles is high structural fidelity for chamber anatomy and low for coronary vessels.
- Tactile fidelity, does handling the model build the discrimination a clinician needs? Rigid prints teach landmarks; they do not teach tissue feel.
- Contextual fidelity, does the task resemble how the knowledge will be used? A labeled model quiz is low contextual fidelity; a case prompt that asks a student to trace a pathway on an unlabeled model is higher.
A useful rule of thumb: match structural fidelity to the assessment, tactile fidelity to the skill, and contextual fidelity to the learner’s level. Introductory students benefit from high structural fidelity and low contextual fidelity, clear, labeled, unambiguous. Clinical students benefit from lower structural fidelity and higher contextual fidelity, messier, unlabeled, embedded in a scenario.
Choosing a Level of Realism
More realism is not automatically better. High-realism models cost more, wear faster, and can overwhelm novices who are still building basic vocabulary. A common pattern in anatomy labs is a progression: labeled physical models early in the term, unlabeled or partially labeled models mid-term, and hybrid or case-based stations near assessment. That progression builds retrieval difficulty gradually instead of jumping from passive viewing to high-stakes practicals.
Digital models earn their place when the objective involves layers, cross-sections, or remote access. Physical models earn their place when the objective involves spatial relationships, handling, or shared attention in a lab. Hybrid setups earn their place when the objective is transfer, moving between representations is itself a skill, and it is the one most likely to appear on a practical exam.
Accessibility Considerations by Format
Accessibility is not a separate purchase; it is a property of the format you choose. Physical models should be handleable at seated height and labeled with text legible at arm’s length. Digital models should support accessibility needs such as adjustable text size and should not depend on color alone to distinguish structures. Hybrid stations should offer a non-tactile route for students who cannot manipulate a model directly, and a non-digital route for students who cannot use a device.
The inclusive move is not to pick the most accessible format. It is to make sure no single format is the only route to a passing grade.
Inclusive Anatomy Lesson Activities That Work
Inclusive anatomy lesson activities work when every student has a role, a route to demonstrate understanding, and a clear objective. Two formats consistently deliver: station rotations and collaborative case studies.
Artistic and model-based projects also open routes for students who struggle with traditional lab formats. Our guide on how to teach biology using artistic models covers several of these approaches in detail.
Station Rotations and Collaborative Case Studies
Station rotations split a lab into timed stops, each with a different format: a physical model, a digital station, a written case, and a peer-teaching stop. Students rotate through all four, so no single format decides their grade. Build in a short individual reflection at each stop so accountability stays with the learner.
Collaborative case studies work the same way in reverse. Give each group a clinical scenario and a model, and ask them to trace the relevant structures and explain their reasoning. Assign roles (reader, model handler, note-taker, presenter) so participation is visible.
Watch out: rotations fail when the timing is too tight. Build in a buffer stop and let groups finish rather than rush, or the activity rewards speed over understanding.
A Selection Framework by Learner Level and Learning Objective
A selection framework by learner level and learning objective keeps model purchases tied to outcomes instead of catalog appeal. We group the decision into three questions: who is learning, what must they be able to do, and how will you assess it.
Work through this checklist before you buy:
- Name the learner level: introductory, clinical, or specialty training.
- Write the specific objective as an observable action, such as “identify the chambers of the heart and trace blood flow.”
- Decide the assessment method: practical identification, written explanation, or both.
- Match the model’s detail to the objective, not to the most impressive catalog item.
- Confirm the model can be handled by students, not just demonstrated by an instructor.
- Check whether a digital or hybrid option covers objectives the physical model cannot.
- Plan storage, cleaning, and replacement before ordering.
The framework is deliberately boring. Boring frameworks get used. Elaborate ones get filed away.
Evidence of Training Effectiveness and Assessment
Evidence of training effectiveness in anatomy education rests on whether students can do the thing you taught, not on whether they enjoyed the session. That means aligning assessment to the objective and using more than one route to demonstrate competency. Most guides stop at that sentence. This section goes further: what to measure, how to measure it, and how to read the evidence you find.
The research base is still maturing. The 2024 students’ perspectives study and the related work on inclusivity in anatomy education describe implementation efforts without reporting adoption rates or measured outcomes in the available summaries, which is a useful reminder to read claims carefully. Where a vendor or a paper promises a specific percentage improvement, check the sample and the assessment method before you build a curriculum around it.
A Four-Level Framework for Measuring Outcomes
A practical way to organize evidence is by what you are actually trying to prove. Four levels, borrowed from common training-evaluation practice, keep the questions honest:
- Reaction, did students find the activity usable and fair? Measure with a short post-session survey, not a satisfaction score alone. Ask specifically whether the format allowed them to show what they knew.
- Learning, did knowledge or skill improve? Measure with a pre/post practical identification scored against a rubric, or a short retrieval quiz before and after the unit.
- Behavior, can students apply the knowledge in a new context? Measure with a transfer task: an unlabeled model, a case prompt, or a peer-teaching explanation.
- Results, does the change hold up over time or in downstream performance? Measure with a delayed retention check four to six weeks later, or a comparison of practical exam scores before and after the curriculum change.
Most instructors can run levels 1 and 2 within a single unit. Levels 3 and 4 take a term or more, but they are the levels that answer the question a department chair will actually ask.
Practical Assessment Design
Assessment is where inclusive design proves itself. If your only route to a passing grade is a timed written exam, you have excluded students your teaching was designed to include. A more defensible design uses multiple routes to the same competency:
- Practical identification with a physical or digital model, scored against a rubric that names the structures and the relationships, not just the labels.
- Short written or verbal explanation of relationships between structures, so students who recognize but cannot spell a term are not penalized twice.
- Transfer task applying a structure to a clinical scenario, which tests whether the knowledge is usable rather than merely recognizable.
- Delayed check on a subset of objectives four to six weeks later, which distinguishes cramming from retention.
Score each route against the same rubric so the evidence is comparable. A student who passes the practical but fails the written explanation is telling you something about the assessment, not just about themselves.
Reading the Evidence You Find
When you evaluate a study, a vendor claim, or a conference abstract, ask four questions before you act on it:
- What was measured? Satisfaction, identification accuracy, retention, or clinical performance are different outcomes and are not interchangeable.
- Compared to what? A gain from pre-test to post-test is weaker evidence than a gain against an active comparison group.
- Who was in the sample? Introductory undergraduates and clinical trainees respond differently to the same intervention.
- How long did the effect last? Immediate post-test gains often fade; delayed measures are the ones that matter for curriculum decisions.
A claim that survives all four questions is worth building on. A claim that survives none of them is marketing.
Using Assessment Data to Revise the Activity
Assessment data is most useful when it feeds back into the activity rather than the student. Track which objectives students miss most, then ask whether the miss is a content problem, a format problem, or an assessment problem. If most students miss the same structure on the same model, the model may not show it clearly. If students pass the practical but miss the transfer task, the activity may be teaching recognition rather than application. If one group consistently underperforms, check whether the format is creating an access barrier rather than a knowledge gap.
A short review cycle, assess, identify the pattern, change one thing, reassess, produces more usable evidence in a term than a single large study design. It also gives you something concrete to show when you propose a change to a curriculum committee.
Cleaning, Durability, and Accessibility of Teaching Tools
Cleaning, durability, and accessibility decide whether a teaching tool survives a semester of student handling. A model that cannot be cleaned between sections, or that chips at the joints, becomes a liability rather than an asset.
Durability questions are fair ones to ask before choosing a set of models. A model that lives in a lab gets handled by dozens of students, dropped on a bench, and stored in a cupboard. Before you commit to a set, read our guide on the durability of 3D printed classroom models for what to check and what to ask.
For cleaning, follow the manufacturer’s instructions for the specific material, and build a routine into the lab schedule rather than leaving it to chance. For accessibility, confirm that models can be handled at seated height, that digital alternatives exist for students who cannot attend in person, and that labels are legible at a distance.
Bringing Inclusive Anatomy Tools Into Your Classroom
Bringing inclusive anatomy tools into your classroom is a planning exercise as much as a teaching one. Start small, test with one unit, and scale what works.
A realistic rollout:
- Pick one unit and one objective.
- Add one active learning activity and one alternative route to demonstrate understanding.
- Choose a model format that matches the objective.
- Assess, review, and adjust before expanding.
If you are equipping a department rather than a single course, it helps to ask about bulk orders before you build a budget.
At LumaLayer Creations, we make custom 3D-printed anatomical models for educators, designed to make complex biological structures tangible for classrooms and clinics. If you are ready to equip your classroom with models built around your learning objectives, explore our shop and tell us what your students need to be able to do.
Frequently Asked Questions
What does inclusive teaching mean in anatomy education?
Inclusive teaching means designing anatomy courses so every student can engage with the material, regardless of learning style, background, or ability. It involves adapting curricula, using inclusive language and resources, and normalizing variation in bodies. A 2024 study in Anatomical Sciences Education reported a drive to implement inclusive practices by adapting curricula and using inclusive language. Inclusive teaching is a curriculum-design issue, not only a matter of visual representation.
How can anatomy educators make lessons more accessible to students with different learning needs?
Start with Universal Design for Learning, which a scoping review in Anatomical Sciences Education examined as a framework for healthcare education. Offer multiple ways to access content: physical 3D anatomy models for teaching, virtual models, audio descriptions, and written guides. Use inclusive anatomy lesson activities like station rotations that let students engage through touch, sight, or discussion. Provide low-stakes retrieval practice and allow flexible assessment formats so students can demonstrate clinical competency in ways that fit their strengths.
What are effective active learning in anatomy strategies?
Active learning in anatomy works best when it combines hands-on manipulation with peer discussion. Try low-stakes retrieval quizzes at the start of each session, think-pair-share for anatomical relationships, and case-based group work using 3D anatomy models for teaching. Keep activities structured so all students participate, not just the most confident.
How can 3D anatomical models support inclusive anatomy education?
3D anatomy models for teaching make complex biological structures tangible, which helps students who learn best through touch and spatial reasoning. Physical models let learners explore anatomical structures by hand. When selecting models, check durability, cleaning requirements, and anatomical detail so they hold up to constant handling in a classroom or clinical skills lab.
Where can educators find anatomy teaching tools for hands-on learning?
Look for independent studios and specialty suppliers that offer custom 3D-printed anatomical models designed for classroom use. LumaLayer Creations, an independent Colorado studio, creates 3D-printed anatomical models that make complex structures tangible for classrooms and clinics. When evaluating any provider, ask about material durability and replacement policies. Request detailed specifications before committing to a full set for multiple body systems.
How can educators assess whether anatomy teaching strategies are inclusive?
Use a mix of direct and indirect measures. Track participation across activity types to see whether the same students dominate hands-on stations. Compare assessment results across learner groups to spot gaps. Ask students for feedback on whether language, examples, and materials felt respectful and accessible. A 2024 Anatomical Sciences Education study on student perspectives of inclusive practices supports gathering student input directly. Review your curriculum design annually and adjust based on both performance data and student experience.

0 Comments