


Last Updated: October 22, 2026
Quick Summary
The interatrial septum on a heart model is the fibromuscular wall separating the left and right atria, marked by the fossa ovalis and its raised limbus. Find the fossa ovalis as a shallow depression, then trace the limbus rim around it before labeling. In adults the fossa ovalis makes up roughly 28% of total septal area.
- The average fossa ovalis area is about 240 mm² in adults but only about 43 mm² in infants.
- Identify the septum by tracing the vena cavae and pulmonary veins to find both atria first.
- Secundum defects sit near the fossa ovalis, primum defects lower, and sinus venosus defects high.
- A patent foramen ovale is an unsealed flap, not the same thing as a true septal defect.
- The thin septal floor cracks first, so never squeeze the assembled model to make a point.
Table of Contents
- Why the Interatrial Septum Deserves a Closer Look
- Anatomy of the Interatrial Septum: What You Are Actually Looking At
- Identifying Heart Structures on Anatomical Models
- Demonstrating Atrial Septal Defects on a Model
- How 3D Printed Anatomy Models for Patient Education Change the Conversation
- Assembling and Handling a Physical Heart Model
- Comparing Model Types: Physical, Digital, and Hybrid
- Conclusion
- Frequently Asked Questions
Why the Interatrial Septum Deserves a Closer Look
The interatrial septum on a heart model is the wall between the two upper chambers, and it holds more detail than most students expect.
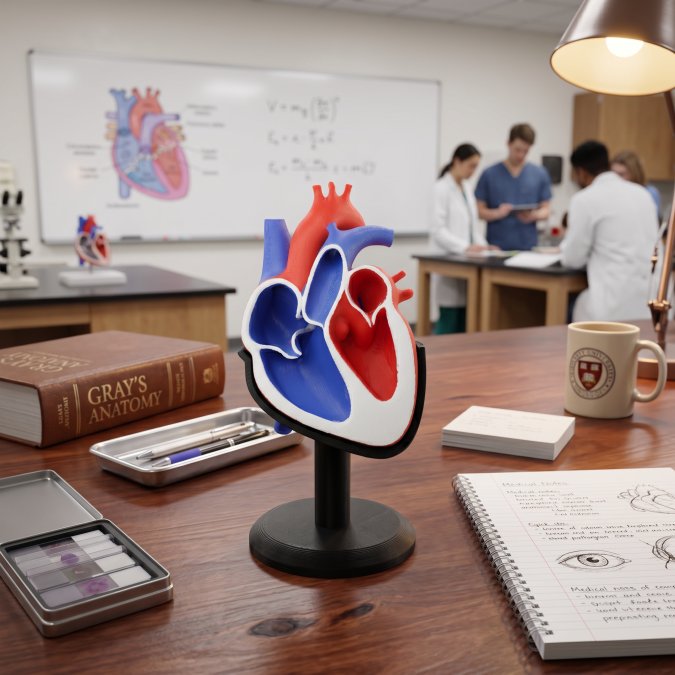
Here is the problem. Most diagrams show the septum as a flat sheet. It is not. The septum has ridges, thin spots, and a raised rim around a shallow depression.
Below, we walk through what the septum actually contains, how to find each part on a physical model, and which model type suits your teaching goal. The payoff is simple: you stop memorizing labels and start reading the anatomy.
Anatomy of the Interatrial Septum: What You Are Actually Looking At
The interatrial septum is the fibromuscular wall that separates the left atrium from the right atrium. It is not a single flat plane. It is a layered structure built from two embryonic sheets that fuse in stages, which is why its surface looks uneven.
That unevenness is the teaching point. A good model should show it.
Fossa Ovalis and the Septum Primum
The fossa ovalis is the shallow oval depression in the lower part of the septum. It is the leftover footprint of the foramen ovale, the opening that let blood bypass the fetal lungs. The flap that once sealed that opening comes from the septum primum.
Size matters here. The average fossa ovalis area is about 240 mm² in adults but only about 43 mm² in infants, per the same American Heart Journal study. On a model, that difference explains why the fetal circulation story only makes sense at infant scale.
Septum Secundum and the Atrioventricular Endocardial Cushions
The septum secundum is the thicker, muscular sheet that grows down beside the septum primum. Its lower edge forms the limbus, the raised rim you can feel around the fossa ovalis. The atrioventricular endocardial cushions sit below, and they contribute to the lower septal region.
If your model shows a clear rim and a thin central floor, you are looking at the primum and secundum relationship correctly.
Run a finger along the rim before you label anything. Students who feel the limbus first rarely confuse the fossa ovalis with a defect later.
Identifying Heart Structures on Anatomical Models
Start with landmarks, not labels. Identifying heart structures on anatomical models gets easier when you orient yourself before naming parts.
Use this order every time:
- Find the right atrium and left atrium by tracing the vena cavae and pulmonary veins.
- Locate the septum between them and note its angle.
- Find the fossa ovalis as a depression, not a hole.
- Trace the limbus around it.
- Check septal thickness at the upper and lower margins.
That sequence works on printed models, digital models, and cadaver specimens alike. The structures do not move. Only the medium changes.
Demonstrating Atrial Septal Defects on a Model
Demonstrating atrial septal defects on a model works best when the model lets you show the defect in context, not as an isolated hole. An atrial septal defect is a persistent opening in the septum that allows blood to shunt between the atria.
Defects vary by location:
- Secundum defects sit near the fossa ovalis, the most common position.
- Primum defects sit lower, near the cushions.
- Sinus venosus defects sit high, near the vena cavae.
A model with a removable insert lets you swap a closed septum for a defect version in seconds. That side-by-side comparison lands better than any slide.
Do not describe every opening as a defect. A patent foramen ovale is a flap that did not seal, not the same thing as a true septal defect. Mixing the two confuses students during clinical correlation.
How 3D Printed Anatomy Models for Patient Education Change the Conversation
Using 3D printed anatomy models for patient education turns an abstract explanation into something a patient can hold. That shift matters most when you are describing a shunt, a closure procedure, or a congenital heart condition.
Research keeps confirming how varied this anatomy really is.
Work by researcher MS Hur and colleagues used dissection and imaging to map channels in the septum that had not been documented before. Models built from that kind of data carry real detail into the room.
For a patient, that means fewer hand gestures and more pointing at a tangible object.
Assembling and Handling a Physical Heart Model
Most printed heart models arrive in halves, and the assembly step is where students either lock in the septal anatomy or lose it. The trick is to treat assembly as an anatomy exercise, not a hardware task.
Work in this order every time:
- Lay both halves interior-up on a clean, flat surface, and identify which half carries the right atrium and which carries the left.
- On each half, find the septal surface and mark the fossa ovalis depression with a fingertip before anything is joined.
- Locate the alignment pins or magnets and confirm they sit on the same side as the septal rim, not the free wall.
- Seat the pins gently and press the halves together evenly, working from the septal edge outward so the thin central floor does not flex.
- Rotate the assembled model and confirm the vena cavae and pulmonary veins line up before locking it closed.
- Re-find the limbus by touch on the assembled model. If the rim feels continuous and the fossa reads as a shallow bowl, the halves are seated correctly.
A common pattern is that the septal floor is the thinnest printed feature, so it is also the first thing to crack. Two habits prevent most damage.
Handling rules that keep a model usable for years:
- Keep it away from heat sources such as radiators, car trunks, and direct summer sun, since many printed polymers soften well below boiling.
- Clean with a dry or barely damp cloth; avoid solvents that dull the surface detail.
- Store it assembled in a padded case, or store halves flat with the septal face up so nothing rests on the thin floor.
- Never force a joint that resists. A joint that will not seat usually means a pin is misaligned or a bit of debris is trapped.
Before class, assemble the model yourself once and trace the limbus with a dry-erase marker, then wipe it off. The faint residue left in the groove gives students a guide line for their first pass.
Buy or print models with removable septal inserts. One model then covers normal anatomy, defect anatomy, and closure, which saves budget and shelf space.
Comparing Model Types: Physical, Digital, and Hybrid
No single model type wins everywhere.
| Model Type | Best For | Main Strength | Main Limitation |
|---|---|---|---|
| Physical printed | Classroom handling, patient talks, first contact | Touch and spatial sense; the limbus and fossa read by feel | Fixed view, storage needs, thin septal floor is fragile |
| Digital 3D | Self-study, remote teaching, review | 360-degree rotation, zoom, cross-section slicing | No tactile feedback; students can rotate past the septum without noticing it |
| Hybrid | Clinical demo, mixed groups, exam prep | Physical plus interactive view; lets you point and rotate at once | Higher setup effort and cost |
Match the model to the objective:
- If the goal is orientation and palpation, finding the fossa ovalis, tracing the limbus, feeling septal thickness, start physical. Touch is the whole point, and no screen reproduces it.
- If the goal is spatial relationships across planes, seeing how the septum sits between the vena cavae and pulmonary veins, digital 3D wins, because students can rotate the model and slice through it.
- If the goal is clinical correlation, showing a secundum defect next to a normal septum, hybrid is the strongest option, since you can hold the physical model and switch the digital view at the same time.
- If the goal is exam review at home, digital is usually the practical choice because it travels and costs less to duplicate.
A common pattern in classrooms is to buy one physical model per table and pair it with a shared digital view on a projector.
Digital platforms now offer interactive 360-degree views of the cardiac septum, and XRAnatomy’s anatomical resources show how far that has come. Imaging advances help too.
Our view: start physical for first contact, add digital for review, and use hybrid when you present to mixed audiences.
Conclusion
The hardest part of teaching the interatrial septum is not the vocabulary. It is getting students to see a layered, uneven wall instead of a flat line. A well-made model fixes that in one session.
At LumaLayer Creations, we build custom 3D-printed anatomical models that show the fossa ovalis, the limbus, and septal thickness in real detail. Our models are made for repeated classroom handling, and we work directly with educators on custom requests. Explore our shop to find a model that makes the septum click for your students.
Frequently Asked Questions
What is the function of the interatrial septum in the heart?
The interatrial septum is the fibromuscular wall that separates the left atrium from the right atrium. In the fetus it carries the foramen ovale, which lets oxygenated blood bypass the lungs. After birth the foramen ovale usually seals, and the septum becomes a full barrier that keeps oxygen-rich and oxygen-poor blood in their own chambers. On a heart model, you can trace this wall between the two upper chambers and see the fossa ovalis, the shallow depression marking where the fetal opening sat. The fossa ovalis averages about 240 mm² in adults and 43 mm² in infants, according to a 1979 American Heart Journal anatomical study.
How do you demonstrate the fossa ovalis on a heart model?
Open the right atrium so you are looking at the septal wall from the right side. The fossa ovalis appears as a thin, oval depression ringed by a raised rim called the limbus. On a good model, the floor of the fossa is visibly thinner than the surrounding septum, which is the point students need to feel. Run a finger across the rim, then press gently on the floor to show the difference in thickness. This tactile contrast is why physical models work well for teaching: a 2016 Jagiellonian University Medical College study mapped the true interatrial septum specifically to improve the safety of transseptal procedures, and that same landmark logic applies in the classroom.
How can 3D printed heart models improve student understanding of septal defects?
Printed models let students hold a septal defect in their hands instead of hunting for it on a flat image. A model with a removable atrial wall shows exactly where an ostium secundum defect sits relative to the fossa ovalis, and a printed patch or plug can be fitted into the opening to show how closure works. Because the model is a physical object, students can rotate it, compare a normal septum with a defective one side by side, and repeat the exercise without damaging anything. Research on porcine hearts published in PubMed in 2018 found that 22.7% showed a patent foramen ovale channel, which makes the point that these openings are common and worth teaching carefully.
What materials are best for high-detail anatomical teaching models?
Rigid filaments hold sharp detail for small structures like the limbus of the fossa ovalis, while slightly flexible materials survive being dropped or squeezed by students. Many educators prefer a two-material approach: a stiff core for the septal wall and a softer outer layer for the chambers. Layer height matters more than brand; finer layers show the septal thickness gradient and the ridge around the fossa ovalis more clearly. Ask any provider how the model handles repeated handling, since classroom use is harder on a model than a display shelf. LumaLayer Creations builds custom anatomical models for educators and can discuss material options for your specific teaching needs.
0 Comments