


Table of Contents
- Why Gothic Cosplay Armor Demands Better Materials
- Cosplay Armor Materials That Balance Weight and Durability
- Cosplay Armor Fitting Tips for All-Day Wear
- Cosplay Armor Painting Techniques for a Gorgeous Finish
- Cosplay Armor Care and Storage Between Events
- Gothic Design Details: Shoulder Armor, Blueprints, and Reference Images
- Conclusion
- Frequently Asked Questions
Last Updated: October 10, 2026
Why Gothic Cosplay Armor Demands Better Materials
A high quality gothic cosplay armor guide starts with one uncomfortable truth: the material you choose decides whether your build survives a convention weekend or collapses in the parking lot.
3d printed gothic pendant pierced heart design
Gothic armor is heavier in silhouette than most fantasy builds. Pauldrons flare. Gorgets stack. Spikes and ridges catch on everything. That shape demands a base that holds a curve, resists cracking, and still lets you raise your arms.
Thermoplastic vs. Foam: Choosing Your Base
Thermoplastic sheets are rigid plastics that soften in hot water or with a heat gun, then harden into whatever shape you press them into. EVA foam is a closed-cell craft foam that cuts with a blade and shapes with heat.
Here is the trade-off in plain terms:
|
Material |
Weight |
Durability |
Best For |
|---|---|---|---|
|
Thermoplastic |
Moderate |
High, holds shape |
Plates, pauldrons, gorgets |
|
EVA foam |
Light |
Moderate, dents easily |
Large curved panels, bracers |
|
Layered foam over thermoplastic |
Light |
High |
Full gothic silhouettes |
Thermoplastic wins on crisp edges and Gothic lines. Foam wins on weight and speed. Most strong builds use both, with foam as the outer skin and thermoplastic as the structural core.
Cosplay Armor Materials That Balance Weight and Durability
Choosing cosplay armor materials is a balancing act between four forces: weight on your shoulders, resistance to impact, how the surface takes paint, and how much skill the material demands from you.
A common mistake is buying the thickest sheet available, assuming thicker means sturdier. In practice, a thinner sheet with a curved profile carries load better than a thick flat panel, and it weighs far less. Curvature is structure.
Material Comparison by Weight, Durability, Cost, and Skill
Here is how the four materials most gothic builds rely on actually compare. Cost is described in relative tiers rather than figures, since sheet pricing swings with thickness, supplier, and order size.
|
Material |
Weight |
Durability |
Relative Cost |
Skill Level |
Paint Behavior |
|---|---|---|---|---|---|
|
EVA foam (closed-cell) |
Lightest |
Moderate, dents and compresses under repeated impact |
Lowest |
Beginner |
Needs heat-sealing or a flexible primer or acrylic soaks in and dulls |
|
Thermoplastic sheet (heat-formable) |
Moderate |
High, holds a formed curve and springs back from knocks |
Mid to high |
Intermediate |
Light scuff, then acrylic grips well; crisp edges read cleanly |
|
Faux leather (PU or vinyl surface) |
Light |
Moderate, abrades at high-friction points, cracks in sunlight |
Low to mid |
Beginner |
Takes acrylic and wax well; not a structural material |
|
Layered foam over thermoplastic core |
Light |
Highest, foam skin absorbs impact, core holds shape |
Mid |
Advanced |
Best of both: foam outer takes weathering, core keeps the silhouette |
How to Read the Table for a Gothic Build
Gothic silhouettes are top-heavy. Pauldrons flare, gorgets stack, and spikes and ridges catch on doorways and crowds. That shape concentrates stress at the shoulder and neck, so the structural core matters more than it does on a flat fantasy breastplate.
- Large curved panels and bracers: EVA foam. It shapes fast, weighs almost nothing, and forgives a beginner’s first cuts.
- Plates, pauldrons, and gorgets: Thermoplastic. It holds the crisp, deliberate edges gothic lines depend on.
- Straps, tabards, and skirt panels: Faux leather. It is the detail layer, never the structure.
- Full gothic silhouettes: Layer foam over a thermoplastic core. Foam becomes the outer skin; the core carries the load.
The Skill-Level Trade-off Nobody Mentions
Thermoplastic punishes impatience. Overheat it and the sheet sags or develops a glossy skin that resists paint; underheat it and it cracks along the fold. EVA foam punishes carelessness instead, a dull blade tears the cell structure and the tear shows through every coat of paint.
Most practitioners find that the fastest path to a high-quality finish is to learn foam first, then add thermoplastic for the pieces where a crisp edge actually shows in photos.
Cosplay Armor Fitting Tips for All-Day Wear
Good cosplay armor fitting tips all point to the same goal: the armor should move with you, not against you.
Start with the harness, not the plates. Build the strap system first, then attach armor to it. This order lets you test weight distribution before you commit to placement.
Fit testing checklist:
- Raise both arms overhead. Nothing should dig into the armpit.
- Turn your head fully left and right. The gorget should clear your jaw.
- Sit down in the armor. Front plates should not collide with your thighs.
- Walk 50 steps. Straps should not migrate or loosen.
- Wear it for 30 minutes indoors before the event.
Ventilation matters as much as fit. Solid thermoplastic traps heat. Leave gaps at the spine, under the arms, and behind the knees, or line the interior with a breathable mesh.
Cosplay Armor Painting Techniques for a Gorgeous Finish
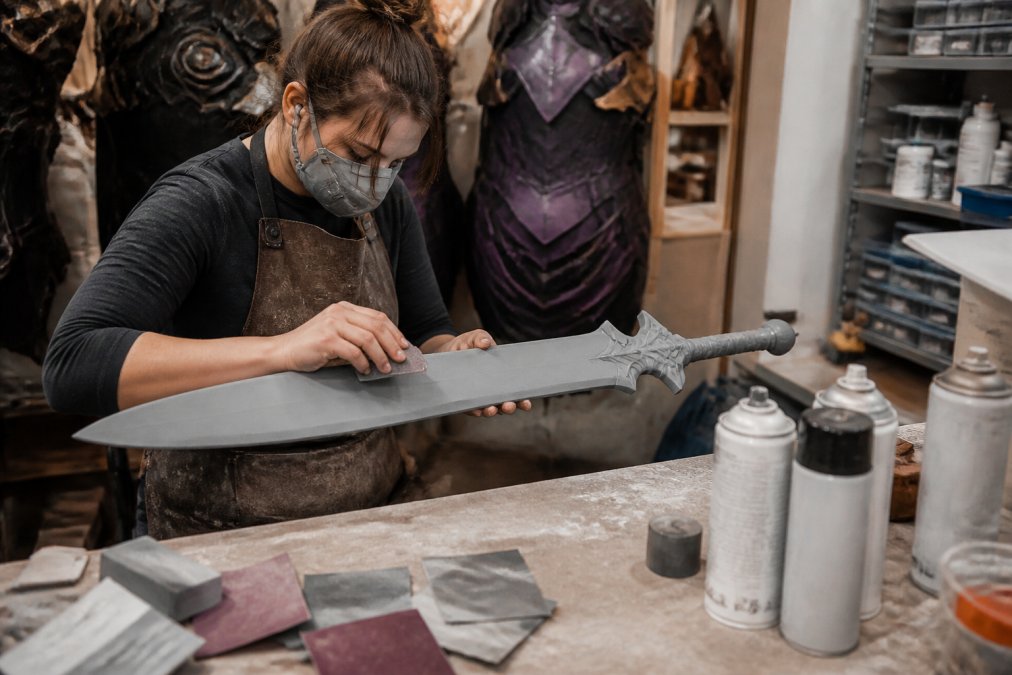
The best cosplay armor painting techniques share one habit: patience between coats. Most finishes that look cheap are not cheap materials. They are rushed layers.
Seal the surface first. Foam needs a flexible primer or a heat-sealed skin before paint touches it, or the acrylic will soak in and dull.
Apply paint in thin passes and build color gradually. Dry-brushing, where you wipe most of the paint off the brush before touching the surface, catches raised edges and creates natural highlight.
Weathering and Dirt Effects That Read as Authentic
Weathering is the difference between a costume and a battle-worn relic. Real armor wears where it moves and where hands touch it.
Focus dirt and scuffing on edges, rivet heads, strap contact points, and the lower third of any hanging piece. Use a sponge for broad grime and a stiff brush for streaks. Keep the upper surfaces cleaner, since rain and gravity pull dirt downward.
Do not seal weathering with a glossy clear coat. Gloss reflects light and makes dirt read as a shiny smudge rather than grime. Matte or satin only.
Cosplay Armor Care and Storage Between Events
Cosplay armor care and storage decides how many events you get out of one build. Most damage happens in transit and in the closet, not on the convention floor.
Clean each piece with a soft, slightly damp cloth. Avoid solvents, which strip paint and dull faux leather.
Storage rules:
- Hang plate pieces on padded hangers or store flat in a rigid bin
- Never stack heavy plates on top of foam pieces
- Keep faux leather away from direct sunlight, which fades and cracks it
- Store small hardware, rivets, and straps in labeled bags
- Add a silica packet to each bin to control humidity
For transport, wrap each plate in a cloth or bubble wrap and pack the heaviest pieces at the bottom.
Basic repair kit to carry: super glue, contact cement, a small heat source, spare elastic, black acrylic paint, and a fine brush.
Gothic Design Details: Shoulder Armor, Blueprints, and Reference Images
Shoulder armor is where a gothic build announces itself. Layered pauldrons, pointed lames, and raised ridges create the dark, architectural silhouette that defines the style. But the silhouette is only half the job, the finishing techniques are what separate a gothic piece from a generic fantasy pauldron, and almost no guide covers them.
Reading Historical Gothic Plate as a Design Source
Historical Gothic plate armor, produced in Europe from roughly the 15th century onward, is your best design reference. Study how the original pieces fluted and tapered. Those flutes were structural, adding rigidity without weight, and they translate directly into foam and thermoplastic builds.
Three features are worth copying deliberately:
- Fluting: shallow parallel ridges that stiffen a plate and catch light along their length. On foam, press them in with a heated rounded tool; on thermoplastic, form them over a dowel while the sheet is still pliable.
- Tapered lames: overlapping horizontal plates that narrow toward the body. They let a pauldron follow the shoulder without a single rigid shell.
- Rolled and roped edges: a thickened lip along the border. It hides a cut edge, adds a highlight line, and stops the plate from reading as flat.
Gothic Finishing: Patina, Edge Detailing, and Consistent Weathering
A gothic finish is darker, cooler, and more oxidized than a standard metallic paint job. Build it in layers:
- Base: matte black or dark charcoal, two thin coats.
- Metallic mid tone: gunmetal or aged silver, dry-brushed on raised edges and flute crests.
- Patina: a thinned blue-green or dark brown wash worked into recesses and wiped back. This is what reads as age rather than dirt.
- Edge detailing: brass or bronze on rivets, trim, and the rolled lip of each plate.
- Seal: matte clear coat overall, satin only on high-contact areas.
Consistency is the hard part. Weathering that varies piece to piece looks accidental. Pick a light direction and a wear logic before you start, edges and contact points wear bright, recesses collect grime, and the lower third of any hanging piece takes the most dirt. Apply that same logic to every plate.
Do not seal a patina with a glossy clear coat. Gloss reflects light and makes the oxidized wash read as a shiny smudge rather than age. Matte or satin only.
Blueprints, Templates, and Symmetry
Always work from a reference image before you cut. Gather photos from museum collections, historical reenactment sources, and fantasy concept art. Then build a miniature reference: a small paper or foam mock-up of the piece at one-quarter scale.
Blueprints and templates turn a reference into repeatable parts. Trace your pattern onto card stock, test it against your body, then transfer it to the material.
For builders who want a head start on gothic detailing, our shop offers original 3D-printed gothic and cosplay accessories that pair well with handmade plate work.
Conclusion
Building a full gothic kit takes weeks, and the details that make it look expensive are the ones most builders skip: fitted harnesses, patient paint layers, and proper storage.
LumaLayer Creations builds original 3D-printed gothic and cosplay accessories from our independent studio, alongside custom designs and our published illustrated books.
Explore our Shop to find gothic accessories and 3D-printed details that finish your build, and start your next costume with pieces designed to last past the first event.
Frequently Asked Questions
What materials are best for gothic cosplay armor?
Thermoplastic and EVA foam are the two most common bases. Thermoplastic holds sharp, gothic silhouettes and can be reheated for reshaping, while EVA foam is lightweight and beginner-friendly. For surface detail, faux leather and acrylic paint add a high-quality finish. Choose based on how much weight you can carry and how intricate your design is.
How do you make cosplay armor look high quality?
Focus on finishing: sand edges, seal foam before painting, and layer acrylic paint with wax for depth. Add weathering and dirt effects to break up flat color. A reference image or miniature reference helps you match proportions and detail. Small touches like faux leather straps and consistent paint coverage separate a high-quality build from a rushed one.
How do you make lightweight cosplay armor that still feels sturdy?
Use EVA foam for large panels and thermoplastic only where you need structure, such as shoulder armor. Hollow out thick sections, and reinforce stress points with thin thermoplastic strips. This keeps the costume light enough for all-day wear while staying durable through a full convention weekend.
How do you paint and finish cosplay armor?
Start with a primer suited to your material, then build color in thin acrylic layers. Use wax or a matte sealer to protect the paint. For gothic armor, add weathering with diluted acrylics and a dry brush. Let each layer dry fully before the next to avoid muddy finishes. Always test on a scrap piece first.
How do you care for and store cosplay armor?
Clean foam and thermoplastic pieces with a damp cloth and mild soap, then dry completely before storing. Keep armor in a padded bin or garment bag away from heat and direct sun, which can warp thermoplastic. Store shoulder armor and large pieces flat or hanging to prevent bending. Check straps and paint before each event.
What details make gothic cosplay armor look authentic?
Gothic armor relies on sharp silhouettes, layered plates, and dark, weathered finishes. Study historical gothic references for shoulder and chest shapes, then add surface detail like rivets, faux leather straps, and subtle dirt effects. A consistent color palette and careful fitting make the costume read as authentic rather than store-bought.
0 Comments