

Table of Contents
- Why Sanding Makes or Breaks a 3D Printed Cosplay Part
- What You’ll Need Before You Start Sanding
- The Best Sandpaper Grit for 3D Prints: A Progressive Grit Chart
- 3D Print Sanding Tools: Hand Sanding vs Rotary Tools
- How to Remove Layer Lines from 3D Prints Step by Step
- How to Prime 3D Prints for Painting
- Material Matters: Sanding PLA, PETG, ABS, and Resin
- Filling Gaps, Seams, and Surface Defects on Large Parts
- Frequently Asked Questions
Last Updated: October 7, 2026
Why Sanding Makes or Breaks a 3D Printed Cosplay Part
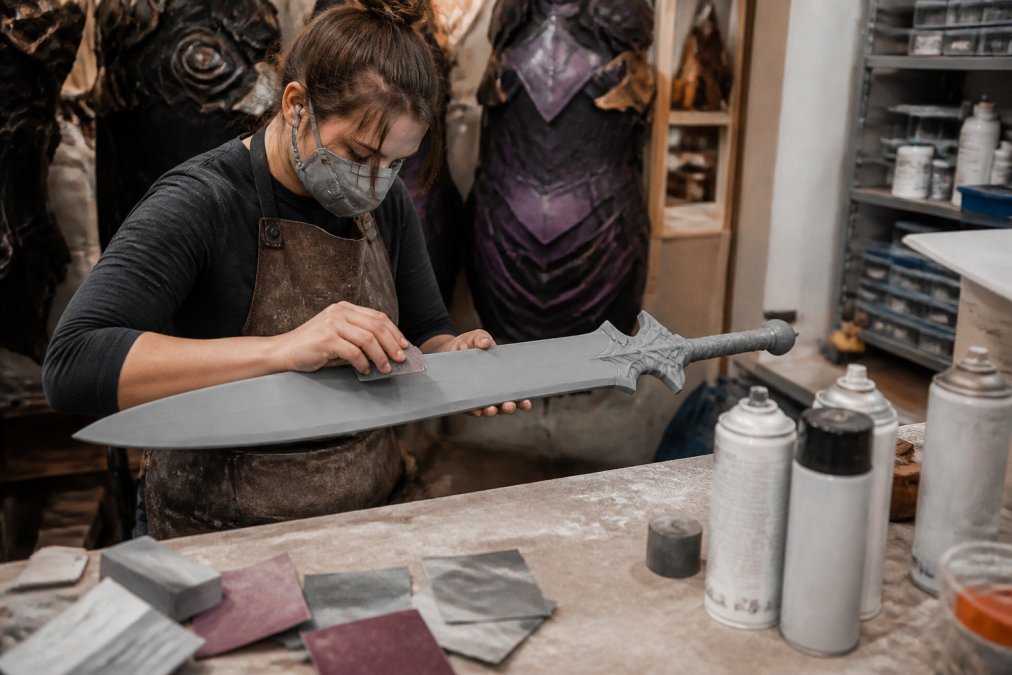
Learning how to sand 3D printed cosplay parts is the difference between a prop that photographs well and one that looks store-bought, and the same care applies when you sand 3D printed cosplay parts for a full build.
Sanding is not about scrubbing harder. It is about moving through grits in order, knowing when to stop, and matching your method to the material.
Below: tools, grits, priming, and fixes for gaps and seams.
What You’ll Need Before You Start Sanding
Gather supplies first so you are not stopping mid-stage. A basic kit covers most cosplay parts:
- Sandpaper in 80, 120, 220, 400, 600, and 800 grit
- Sanding sponges for curved surfaces
- A rotary tool with sanding drums and burrs
Safety gear is not optional. Sanding plastic releases fine dust that irritates lungs and eyes. Work in a ventilated space, and wear eye protection when using a rotary tool. The CDC guidance on respiratory protection explains why a dust mask matters for fine particles.
The Best Sandpaper Grit for 3D Prints: A Progressive Grit Chart
The best sandpaper grit for 3D prints starts coarse and works toward fine, each grit removing the scratches left by the one before it. This is progressive sanding, the core of how to remove layer lines from 3D prints.
Grit Progression by Stage
|
Stage |
Grit |
Purpose |
Notes |
|---|---|---|---|
|
Knockdown |
80-100 |
Cut down high layer lines |
Use light pressure |
|
Shaping |
120-200 |
Smooth ridges and hard edges |
Sand with the grain |
|
Refining |
400-600 |
Remove coarse scratches |
Switch to wet sanding |
|
Polish |
800+ |
Prep for primer and paint |
Final pass before priming |
Start at 80 or 100 grit only when layer lines are heavy. For finer prints, begin at 120. Jumping from 80 straight to 400 leaves deep scratches that show through primer.
3D Print Sanding Tools: Hand Sanding vs Rotary Tools
Hand sanding gives you control. Rotary tools give you speed. Most cosplay projects need both.
Hand sanding wins on curved armor plates, fine details, and anywhere a slip would ruin the shape.
Rotary tools, like a Dremel with a sanding drum, remove material fast, ideal for thick layer lines and hard edges on large pieces.
When to Reach for a Rotary Tool
- Removing support material and blobs from a fresh print
- Shaping hard edges on armor plates
- Grinding down seams where two parts meet
Run rotary tools at low speed on plastic; high speed melts the surface instead of cutting it and gums up the drum.
How to Remove Layer Lines from 3D Prints Step by Step
Follow these steps in order. Rushing any stage shows up later under paint.
- Inspect the print and mark heavy layer lines with a pencil.
- Start with 80-100 grit and sand the worst ridges down.
- Move to 120-200 grit to smooth the surface and soften hard edges.
- Switch to 400-600 grit to remove the coarse scratches.
- Finish at 800 grit for a paint-ready surface.
- Wipe away dust with a soft brush and tack cloth.
- Check for missed spots under good light before priming.
Wet Sanding for a Smoother Finish
Wet sanding uses water to carry dust away and keep paper from clogging, and works best at 400 grit and finer. Soak your paper, keep the surface damp, and rinse the part when you finish for a smoother result with less airborne dust.
How to Prime 3D Prints for Painting
Priming is where hidden flaws appear. Filler primer fills tiny scratches and gives paint something to grip, so apply two or three thin coats instead of one heavy coat, letting each dry and sanding lightly between coats with 600 to 800 grit. Once the primer looks even and dull, the part is ready for paint and clear coat.
Material Matters: Sanding PLA, PETG, ABS, and Resin
Most sanding guides treat every print the same, but they are not. The polymer under your sandpaper decides how much heat it tolerates, how fast the paper loads up, what the dust does to your lungs, and whether a solvent wipe is even an option. Match your method to the material and you will spend less time fixing smeared surfaces.
PLA
PLA is the easiest common filament to sand and the easiest to ruin with a rotary tool. Its glass transition temperature is low, roughly 140°F (60°C), well within reach of a sanding drum at full speed. Friction alone pushes the surface past that point, and the plastic goes from cutting cleanly to smearing and balling up on the abrasive.
- Keep rotary tools at their lowest speed setting and let the drum do the work instead of pressing.
- Start at 120 grit on typical prints; drop to 80 only for heavy layer lines or support scars.
- PLA clogs paper less than PETG but still benefits from a quick brush-off between grits.
PETG
PETG is tougher and slightly more heat-resistant than PLA, but it is the worst common filament for loading up sandpaper. The same toughness that makes it durable makes it gummy under friction, a sheet that lasts a full armor plate on PLA may be done after a few passes on PETG.
- Change sheets often. A loaded sheet stops cutting and starts burnishing, which polishes the layer lines instead of removing them.
- Use a stearate-coated or “no-clog” paper if you can find it; the coating sheds the gummy residue.
- Keep pressure light and strokes short. Heavy pressure generates heat, and heat is what turns PETG sticky.
ABS
ABS sands cleanly and holds an edge well, which is why it is still popular for props that need to take a hit. It also responds to acetone vapor or a careful acetone wipe, which can soften layer lines before you touch sandpaper, but that shortcut has a cost.
- Acetone vapor smoothing requires serious ventilation, away from any ignition source, and it will erase fine detail if you leave the part in too long.
- A light acetone wipe with a lint-free cloth can knock down fuzz without dissolving the whole surface, but practice on a scrap print first.
- If you skip the solvent route, ABS sands much like PLA but tolerates a bit more rotary tool speed before it smears.
Resin
Resin prints are a different animal. They sand fast because the cured surface is hard and brittle, but that same brittleness means thin features chip instead of flexing. Uncured resin is a skin sensitizer, so safety rules tighten considerably.
- Confirm the print is fully cured before sanding. Tacky surfaces mean uncured resin, and sanding it spreads sensitizing residue.
- Wet sand whenever possible. Water captures the fine dust, which is far more hazardous than the shavings from filament prints.
- Wear nitrile gloves, eye protection, and a NIOSH-rated respirator, not a dust mask.
Matching Grit to Material
A simple rule: the softer and more heat-sensitive the plastic, the lighter your pressure and the higher your starting grit. PLA and PETG reward patience; ABS and resin tolerate more aggression but punish sloppy safety habits. When in doubt, test on a scrap print from the same spool or resin batch before committing to a full armor piece.
Filling Gaps, Seams, and Surface Defects on Large Parts
Large cosplay armor almost never prints in one piece. Helmets, chest plates, and gauntlets get split for build volume, then rejoined, and every joint is a potential crack, ghost line, or misalignment. Treating seams as an afterthought is why props split at a convention.
Plan the Seam Before You Print
If you are still in the slicer, decide where the cuts go. Put seams along natural panel lines, edges, or areas covered by another piece, a seam hidden under a shoulder pauldron costs nothing; one down the center of a faceplate costs hours.
- Add alignment features in the model: pins, sockets, or a stepped lip so the halves register the same way every time.
- Orient the print so the seam sits on a flat or gently curved surface rather than a compound curve.
- Leave a small chamfer on mating edges so there is a groove for filler to sit in.
Joining the Pieces
How you join the halves determines whether the seam survives handling.
- Temporary tack: Use cyanoacrylate (super glue) with an accelerator to hold the parts in alignment while you check fit. This is not structural.
- Structural bond: Run a bead of two-part epoxy or a plastic-specific adhesive along the inside of the joint. Epoxy gives you working time to adjust alignment; CA does not.
- Reinforcement: For load-bearing seams, embed a strip of fiberglass cloth or a piece of scrap filament lattice across the inside of the joint with epoxy. This is the step most guides skip, and it is the difference between a prop that survives a car ride and one that does not.
Let the structural bond cure fully before touching the outside; working a seam while the epoxy is soft just shifts the misalignment around.
Filling and Blending
Once the joint is solid, the outside work begins.
- Sand the seam area with 120 grit to give the filler a mechanical key.
- Apply automotive body filler in thin layers, building up rather than trying to fill a deep gap in one pass. Thick filler shrinks as it cures and pulls away from the edges.
- For shallow scratches and pinholes, filler primer is enough. Save the body filler for real gaps.
- Sand the cured filler flush with 120 grit, then refine with 220.
- Re-prime the seam and inspect under raking light.
Diagnosing Ghost Lines
A ghost line is a faint ridge or valley that shows up after priming even though the surface felt flat. It usually means one of three things:
- The filler and the surrounding plastic sand at different rates, so the filler sits slightly proud or slightly recessed.
- The seam was not fully reinforced and is flexing under sanding pressure.
- Primer is building unevenly because the surface has different textures on each side of the seam.
Fix it by sanding the whole area back to bare plastic on both sides of the seam, re-filling, and re-priming. Spot-fixing rarely works because the transition just moves.
Protecting Fit and Detail
Sanding a seam flush removes material, and on a wearable part that can be the difference between a comfortable fit and a pinch point.
- Mask off adjacent detail with painter’s tape before sanding near it.
- Check fit against the wearer or a body form after each filling round, not just at the end.
- On edges that meet skin or another piece, sand a slight chamfer rather than a sharp corner. It is more comfortable and less likely to chip.
When to Stop
A seam is done when it disappears under primer and stays gone after a light wet sand. If you can feel a ridge with a fingernail, keep going; if you can only see it under raking light, one more primer coat and a 600-grit pass usually finishes it.
Frequently Asked Questions
What grit sandpaper should I use on 3D printed cosplay parts?
Start with 80 or 100 grit to knock down major layer lines, then move to 200 grit, and finish with 400 to 800 grit for a smooth surface. Skipping grits leaves scratches that show through paint. For fine details, stay at 400 grit or higher to avoid rounding edges.
How do you sand PLA prints without damaging details?
Use light pressure and higher grits like 400 or 600 on detailed areas. Wrap sandpaper around a small block or dowel to control where you cut. Avoid rotary tools on thin features since they remove material fast. Check progress often under bright light so you do not sand past the detail.
Should I wet-sand 3D printed cosplay parts?
Wet sanding works well at 400 grit and above because it keeps dust down and produces a smoother finish. Use wet-or-dry sandpaper and keep the surface damp. Do not wet-sand parts with water-soluble fillers or unfinished seams, since moisture can soften them.
How do I know when a 3D printed part is ready for paint?
Run your fingers across the surface and look at it under angled light. If you still see layer lines or feel ridges, keep sanding. A coat of filler primer reveals remaining defects. Once the primed surface looks even and smooth, it is ready for paint.
Sanding a cosplay part well takes patience, the right grits, and a plan for seams and defects. When you want a piece that arrives paint-ready and built to survive a convention floor, LumaLayer Creations can help. Our original 3D-printed designs, gothic and cosplay accessories, and custom anatomical models are finished by hand in our studio. Explore our shop to find a piece that fits your build, or reach out about a custom order and we will help bring your design to life.
0 Comments