

Table of Contents
- Why Custom 3D Printed Anatomy Models Beat Off-the-Shelf Options
- Best Materials for Anatomical 3D Printing: A Durability Guide
- How to Commission 3D Printed Models: A Step-by-Step Process
- Anatomy Teaching Tools for Educators: Matching Models to Curriculum
- Post-Processing for Longevity: Finishing That Protects Your Investment
- Failure Rate Analysis and Lifecycle Management for Classroom Models
- Conclusion: Ordering Custom Anatomy Models with Confidence
- Frequently Asked Questions
Last Updated: October 3, 2026
Why Custom 3D Printed Anatomy Models Beat Off-the-Shelf Options
When you buy custom 3D printed anatomy models, you get structures matched to your exact curriculum instead of a generic catalog pick. This guide from LumaLayer Creations covers material selection, commissioning steps, and the durability details that decide whether a model survives a full school year.
Mass-produced anatomical models are built to a fixed mold. Custom printing flips that: the file, the scale, and the material all bend to your teaching goals.
The Durability Problem with Mass-Produced Models
Most classroom anatomy models fail at the joints, not the surface. Mass-produced units often use thin walls and rigid plastics that crack when dropped or over-flexed, and replacement cycles eat budgets fast. Custom printing lets you thicken walls, choose tougher filament types, and add reinforced connection points where student handling stresses a model most.
What Customization Actually Gets You
Customization covers more than color. You can request a specific scale, a cutaway view of a joint, or a removable organ layer for demonstration, and comparative anatomy teachers can order the same structure across multiple species. Labels can also be printed directly into the model, so lettering survives handling instead of peeling off.
Best Materials for Anatomical 3D Printing: A Durability Guide
Material choice decides whether a model lasts one semester or five. Three thermoplastics dominate educational printing: PLA, PETG, and ABS.
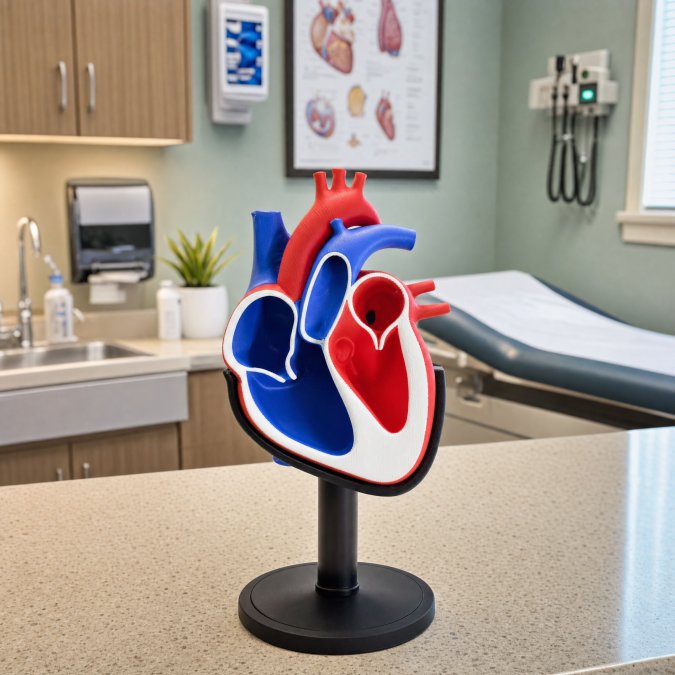
PLA vs PETG vs ABS: Which Survives Student Handling
PLA prints easily and holds fine detail, but it is brittle under impact, and its low glass transition temperature means a model left on a sunny windowsill can soften and sag.
PETG offers better impact resistance and handles drops without shattering, which suits models students pass around.
ABS is the toughest of the three but warps during printing and needs ventilation.
|
Material |
Impact Resistance |
Print Difficulty |
Best For |
|---|---|---|---|
|
PLA |
Low, brittle |
Easy |
Static display models |
|
PETG |
High, flexes |
Moderate |
Handled classroom models |
|
ABS |
Highest |
Hard, needs ventilation |
Heavy-use demonstration pieces |
Print Settings That Decide Whether a Model Survives
Material is only half the story. Three slicer settings determine whether a model survives a year of handling:
- Wall count (perimeters). Two walls is standard for display pieces; three to four dramatically improves impact resistance on handled models. A four-wall PETG vertebra absorbs a desk-height drop that a two-wall version will not.
- Infill pattern. Grid and gyroid distribute stress more evenly than lines. For thin features like ribs or mandibles, gyroid at 20-25% infill resists crushing better than the same density in a line pattern.
- Layer orientation. Layer adhesion is always the weakest axis of an FDM print. A model whose thinnest cross-section runs perpendicular to the layer lines will snap there first, so rotating it on the build plate to align stress paths with the extrusion direction is one of the highest-leverage changes a print studio can make.
Testing Impact Resistance and Layer Adhesion Before You Commit
Ask for a sample print before ordering a full set. A drop test from desk height and a flex test at the thinnest point reveal more than any spec sheet. Layer adhesion matters most: if layers separate under light bending, the model will fail at the joints. Judging by surface finish alone tells you nothing about structural integrity.
A practical pre-order checklist:
- Drop the sample from waist height onto a hard floor and inspect the joints, not the surface.
- Flex the thinnest feature (a rib, a process, a mandible) and watch for whitening at the layer lines, that is the early sign of delamination.
- Weigh the sample. A model that feels suspiciously light for its size usually has low infill and thin walls.
- Submerge a scrap piece in warm water to gauge heat tolerance if models will be stored in warm rooms.
Sealing and Post-Processing for Longevity
Most ranking guides stop at material selection, but the finish determines whether a model keeps its structural integrity after months of handling. Sanding contact points smooths layer lines and removes snag points that catch on sleeves and fingers.
For thin joints, a small epoxy fillet at the connection point spreads stress across a wider area and prevents the crack that would otherwise start at a sharp corner.
How to Commission 3D Printed Models: A Step-by-Step Process
Commissioning a custom model takes two focused steps: define your specifications, then approve a proof before printing. Most back-and-forth happens in step one, so clarity there saves time later.
Step 1: Define Your Anatomical Specifications and File Formats
State the structure, scale, and level of detail you need. If you have an existing STL or OBJ file, share it; if not, describe the structure and let the studio build the model. Note which features must be removable and where labels should sit. Vague requests lead to revision cycles.
Step 2: Review Design Proofs and Set Print Parameters
Review the digital proof before anything prints. Confirm wall thickness, infill density, and material at this stage, since parameters like layer height affect both surface finish and strength. Once you approve the proof, the print matches it.
Anatomy Teaching Tools for Educators: Matching Models to Curriculum
The best anatomy teaching tools for educators map directly to lesson objectives, not a supplier’s catalog. Match the model to what students must demonstrate: a skeletal unit needs articulation, a muscular unit needs removable layers.
- Skeletal systems: articulated joints and durable connectors
- Organ systems: removable layers for demonstration
- Comparative anatomy: matched scale across species
- Clinical demonstration: cutaway views for procedure walkthroughs
LumaLayer Creations builds custom anatomical models for classrooms and clinics, making complex biological structures tangible for students who learn by handling, not just reading.
Post-Processing for Longevity: Finishing That Protects Your Investment
Post-processing determines how long a model keeps its finish. Sanding smooths layer lines, and a protective coating seals the surface against oils and repeated cleaning, slowing wear at contact points on constantly handled models.
- Sand contact points to reduce snagging
- Apply a clear sealant for moisture and oil resistance
- Reinforce thin joints with a small epoxy fillet
- Store models in padded trays between lessons
Failure Rate Analysis and Lifecycle Management for Classroom Models
Tracking failures tells you where to reinforce next, yet most classrooms never do it, which is why the same break keeps happening on the same model. A simple log of model name, break location, uses before failure, and cause turns guesswork into a purchasing decision.
Separating Student-Error Failures from Mechanical Failures
In classroom printing, the two failure categories often get blamed on each other. A model that snaps at a joint after 40 uses is usually a design or material problem, not a student problem.
A practical way to separate them:
- Mechanical failures cluster at the same location across multiple copies of the same model. If three copies of the same mandible crack at the same hinge, the geometry or wall count is the issue.
- Student-error failures are scattered and random. A model dropped on tile, stepped on, or used as a pointer will fail in unpredictable places.
- Print-defect failures show up immediately. If a model delaminates within the first few uses, the print itself was weak, not the design and not the student.
Logging each failure’s category tells you whether to change the model file, the material, or how the model is stored and handled.
A Simple Failure Log You Can Start This Week
You do not need software. A shared spreadsheet with five columns is enough:
|
Model |
Break Location |
Uses Before Failure |
Suspected Cause |
Action Taken |
|---|---|---|---|---|
|
Articulated spine |
Lumbar hinge |
60 |
Mechanical, thin walls |
Reprint with 4 walls, PETG |
|
Heart model |
Aorta attachment |
3 |
Print defect, poor adhesion |
Reprint, new spool |
|
Skull |
Zygomatic arch |
12 |
Student handling |
Reinforce arch, add storage tray |
After a semester, patterns emerge fast: joints fail first, thin walls second, and models stored loose in a bin fail more often than those in trays. That data guides your next order and tells the studio where to add material.
|
Problem |
Likely Cause |
Fix |
|---|---|---|
|
Layer separation |
Poor adhesion |
Raise print temperature |
|
Cracking at joints |
Brittle material |
Switch to PETG |
|
Snapped thin walls |
Low infill density |
Increase wall count |
|
Surface wear |
No sealant |
Add protective coating |
Lifecycle Management: Repair, Retire, or Recycle
Lifecycle management means planning replacements before they become emergencies. Models used daily wear faster than display pieces, so budget replacements on a schedule tied to use, not the calendar. A model that has survived 100 handling sessions is a retirement candidate even if it looks intact, its internal layer bonds have been stressed repeatedly.
When a model does break, three options exist:
- Repair. A clean break at a joint can often be repaired with cyanoacrylate adhesive and reinforced with a small epoxy fillet. Repaired models work for display or demonstration, but not heavy student handling.
- Retire to display. A repaired or cosmetically worn model can move to a shelf or a teacher-only demonstration piece, freeing the handled set for replacement.
- Recycle. PLA and PETG are recyclable in principle, but most curbside programs do not accept 3D-printed parts because they cannot be sorted by resin type. Some filament manufacturers and print studios run take-back programs; ask your supplier before throwing a model away.
Planning Replacements Around Use, Not the Calendar
A model used three class periods a day wears out far faster than one used weekly. Rather than replacing every model on a fixed annual schedule, tie replacement to a use threshold, retire a handled model after a set number of sessions and inspect it at the halfway point. This keeps the budget predictable and prevents mid-lesson failures.
Conclusion: Ordering Custom Anatomy Models with Confidence
Ordering custom anatomy models comes down to three decisions: the right material, a reviewed proof, and a finish that protects the print. Get those right and your models outlast the mass-produced alternatives they replace. For educators who need precise structures built to their specifications, LumaLayer Creations offers custom 3D-printed anatomical models designed to make complex biology tangible in the classroom.
Frequently Asked Questions
What are the benefits of using 3D printed anatomy models in education?
Custom 3D printed anatomy models make complex biological structures tangible for classrooms and clinics. Students can hold, rotate, and examine structures like a heart valve or pelvis in ways diagrams cannot match. Models can be sized up for visibility, split into layers for study, or color-coded by system. For educators, this supports hands-on learning, project-based learning, and design thinking while building technical literacy. Durability matters too: a well-printed model with solid infill density and impact-resistant material outlasts brittle mass-produced plastic that cracks under repeated handling.
How do I commission custom 3D printed models for medical training?
Start by defining your anatomical specifications: which structures, what scale, and how many units. Provide files in STL, STEP, or OBJ format if you have them; if not, describe your vision and ask the studio to create a design proof. Review the proof for anatomical accuracy before printing begins. Discuss print parameters like layer height and infill density, since these affect both surface finish and structural integrity. Ask about turnaround time and replacement policy before you commit. A reputable studio will walk you through each step and confirm details in writing.
What materials are best for durable 3D printed anatomical teaching tools?
PETG offers the best balance of impact resistance and layer adhesion for classroom models that get handled constantly. PLA prints with excellent detail and is fine for display pieces, but it can crack under stress. ABS is tough but harder to print and can warp. For anatomy models with thin structures like ribs or vessels, PETG or a PETG blend resists snapping better. Always ask about infill density (20-30% is typical for sturdy models) and wall thickness. Post-processing like sanding and sealing can further protect the surface finish and extend model longevity.
Are 3D printed anatomy models cost-effective compared to traditional plastic models?
Pricing depends on model complexity, size, material, and quantity, so request a quote for your specific needs. Custom 3D printed models often make sense when you need a specific structure, a non-standard scale, or a set tailored to your curriculum. Unlike mass-produced models, you are not paying for a catalog item that may not match your teaching goals. For educators buying multiple body systems, ask about educational pricing or bulk order options. Factor in durability: a model that survives years of student handling costs less over time than replacements.
0 Comments